Commissioning
Configure Safe Output
To ensure the drive is safely shut off in the event of a robot Emergency‑Stop, you can link one of the robot controller’s safe digital outputs to the drive controller’s STO input. The safe digital outputs are configured on the teach pendant under Installation → Safety → I/O. In our example, we use the output pair CO0 / CO1.
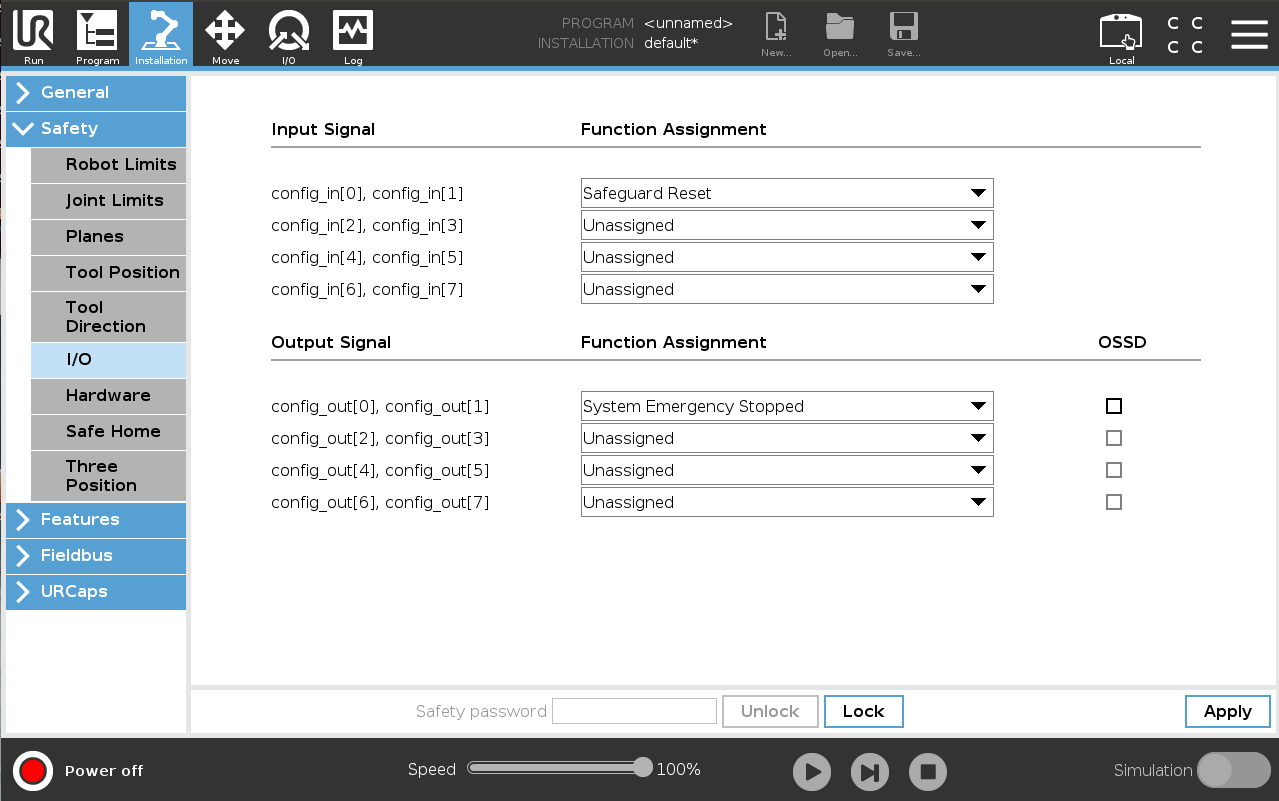
Figure: Selecting a safe output pair (CO0/CO1) as the STO signal in the teach pendant.
Configuring the Robot’s IP Address
In order for the robot to communicate with the drive controller, both devices must be on the same subnet. Open Settings via the “hamburger” menu in the top‑right corner of the teach pendant. Under the System tab, you will find the network settings. It is recommended to assign the robot a static IP address.
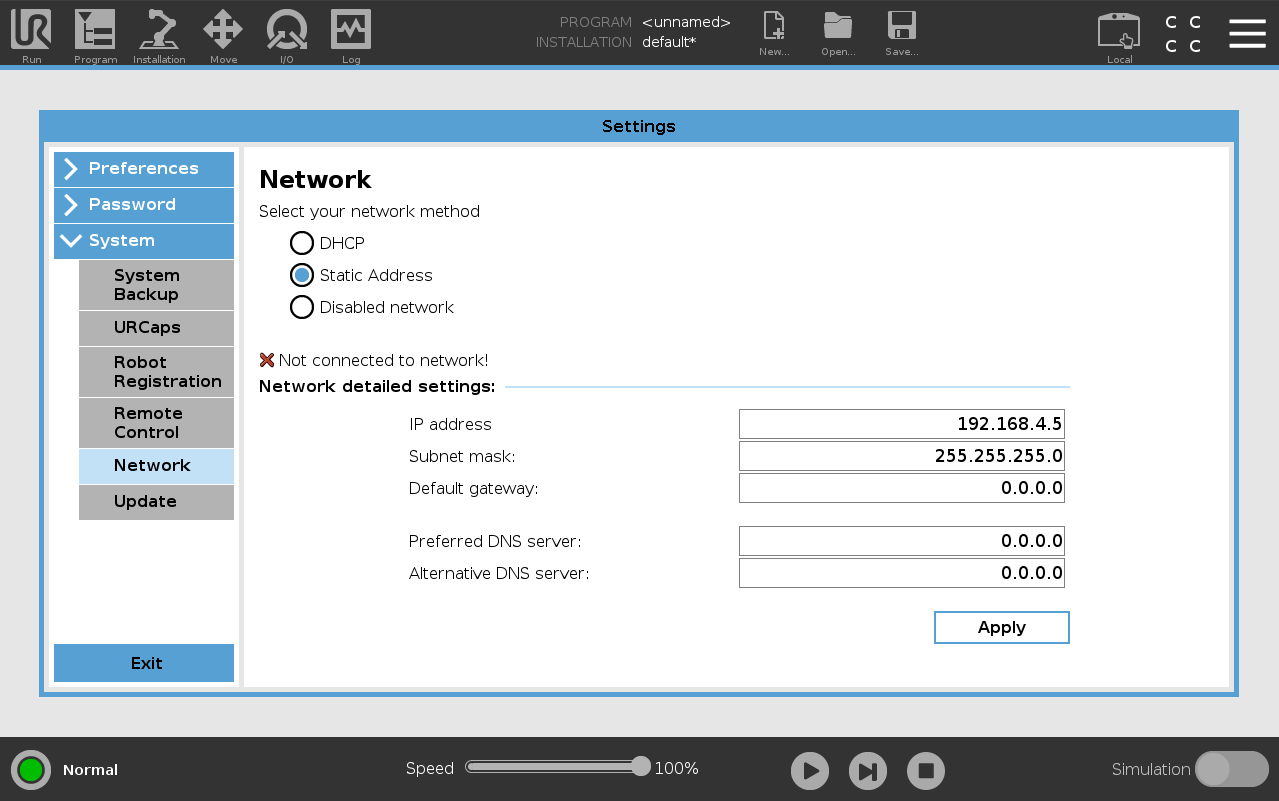
Figure: Network settings panel on the teach pendant, where the robot’s IP address is configured.
Network Access
To allow the esaDrive URCap to communicate with the drive controller over the network, you must ensure that the robot controller’s network ports are not blocked. Open Settings via the “hamburger” menu in the top‑right corner of the teach pendant. Under Security → General, enable the ports as shown in the following image:
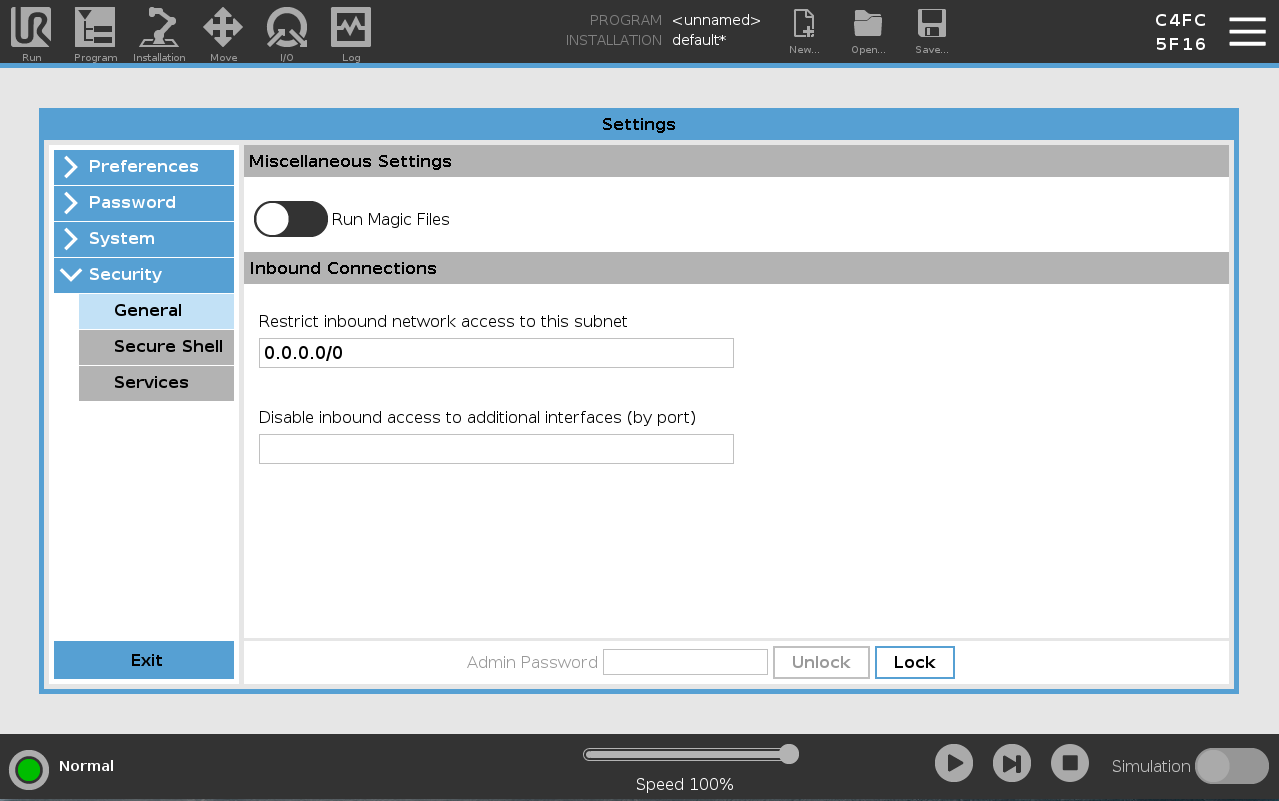
Figure: Network access settings on the teach pendant to allow Modbus‑TCP and other URCap connections.
Install URCap
To use the esaDrive URCap, it first needs to be installed on the robot controller. Copy the installation file with the .urcap extension to a USB stick and insert it into a USB port on the robot controller (either on the teach pendant or inside the control cabinet).
Open the “hamburger menu” in the top‑right corner of the teach pendant, navigate to Settings → System → URCaps, and start the installation. Click the plus icon, select the USB stick as the source, and load the .urcap file. After the installation completes, esaDrive will appear in the list of available URCaps.
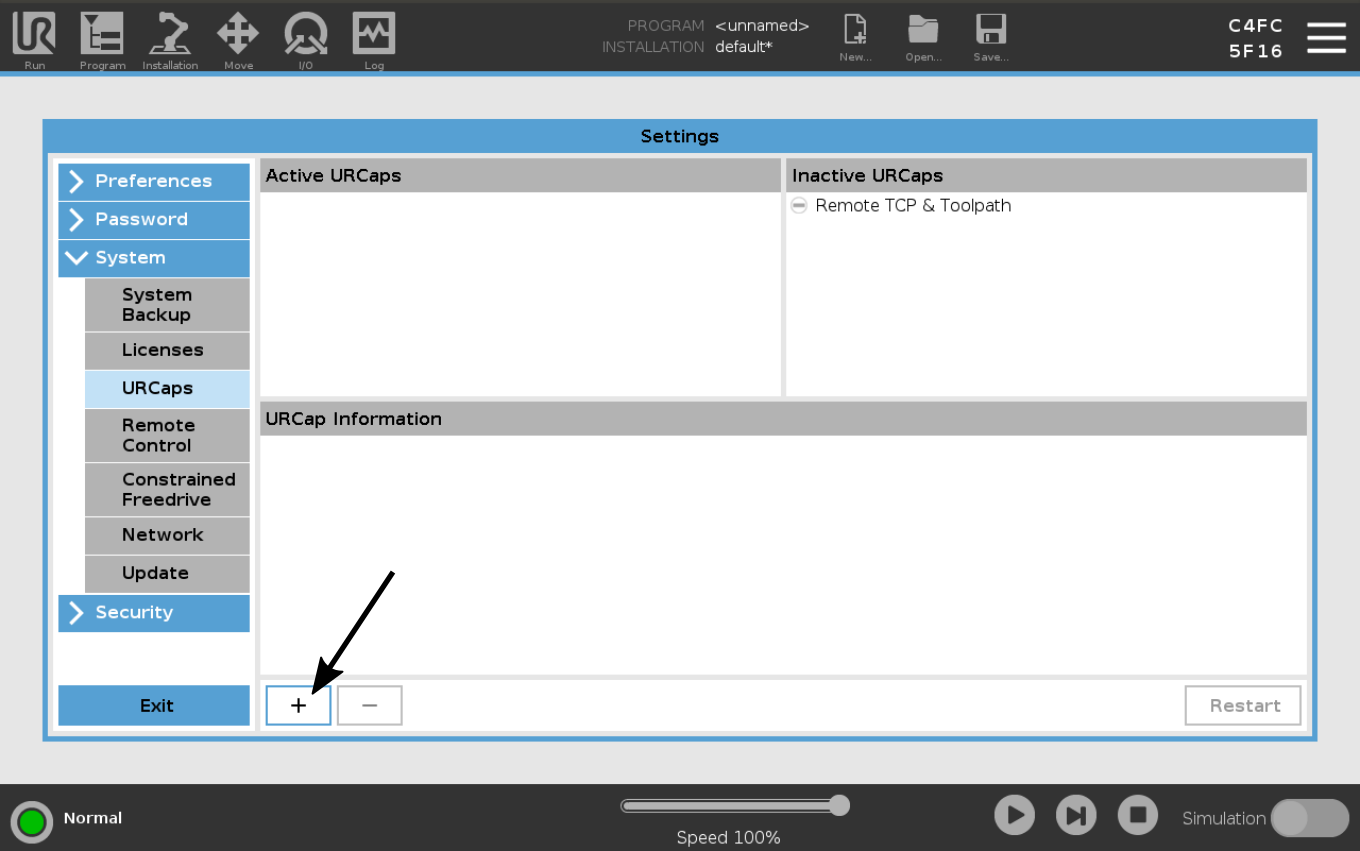
Figure: URCap installation
Pairing the Drive
Once the drive controller has been successfully configured using the Festo Automation Suite, it can be paired with the robot controller. On the teach pendant, navigate to Installation → URCaps and open the Drives panel. The list shows all drives already paired with the robot. To add a new drive, click the green plus icon. The URCap will then automatically perform a network scan and detect all available drive controllers on the network. After selecting the desired drive, it will be paired with the robot.

Figure: Drives panel showing all drives currently paired with the UR controller.